Peacock Midiparser
Table of Contents
Dependencies
- Peacock AE Utility Peacock After Effects Utility
- Peacock UI Utility Peacock UI Utility
Load Midi
Load a txt file that contains midi note on and off information and
import them as slices into the sliceArray (The in points of the slices
are getting added to the markerArray which could be added as markers to
a layer or the composition by clicking the Add button).
Midi converter button
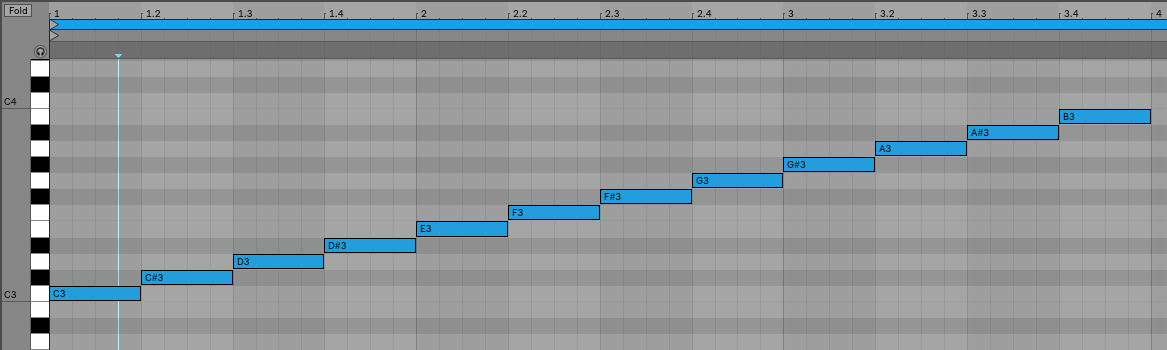
The Midi converter interprets 12 note values in the range of C3 - B3. Please make sure that the midinotes are placed in exactly that range, otherwise the notes won‘t be recognized.
The chosen .mid file is converted to a .txt file with a assigned
videotrack a note-on and note-off value and a velocity value that can be
imported by the Premiere Pro extension BpmSlicer.
- for example:
- 1 0 2.5 0.5
- 2 2.5 3.4 1.0
Bpm editor
Before the midi clip is converted, a tempo event with the given ‚bpm‘ rate is added to the midi clip.
If the midi clip has a tempo event already and you want to use it
instead of a new one, set the bpm value to -1.
If the bpm editor is empty the default bpm value of 120 is used.
Fps editor
The fps value (Frames per seconds) is only needed if you want to use the clipboard to copy keyframes directly onto one of After Effects layer properties. With help of the fps value the time of the midi note-on values can be transformed to frame values.
Clipboard
The velocity values of all midi note-on messages are mapped to the range
of 0.0 - 1.0 and copied to the systems clipboard so that you can simply
paste the values as keyframes onto a selected expression slider
property in After Effects. A expression slider with those keyframes
can then be used to manipulate different properties and effects.
Preparations
NOTE: The following description is confusing because it describs the preparation for the premier pro version of the BpmSlicer which is not yet finished.
Before you can take full advantage of the functionality of the BpmSlicer you need to prepare your footage as follows.
Song preparation
You have to ensure that the following two conditions are met: You need to know the exact bpm value of the song you want to work with and set this value in the bpm input field. You need to make sure that the 1st beat of the song sits exactly at the 0 point in time. Some songs may not have an intro that fits the bpm rate of the actual song, then you need to find the first beat and place it accordingly. If you have the exact bpm rate of the song then it won‘t be too difficult to make it fit.
Preparing the midi clip
Please make sure that the midinotes in the midi file are placed in the range between C3 - B3, otherwise the notes won‘t be recognized. Note that the notes of C3 are placed onto videotrack 1, the notes of C#3 onto videotrack 2 and so on.
| Note | Track |
|---|---|
| C3 | videotrack 1 |
| C#3 | videotrack 2 |
| D3 | videotrack 3 |
| … | … |
| B3 | videotrack 12 |
Preparing your footage
If there is no BpmSlicer folder structure already you can create one by
clicking the create folders Button. The next step is to put all your
footage you want to be placed into the active sequence, according to the
notes in the midi file, into the 1 source folder and assign the
appropriate prefix for each footage item. Make sure the prefix is a
number between 1 - 12 and make sure there is a white space between the
prefix number and the footage name.
The next thing you want to make sure is that you add as much videotracks to the active sequence as your highest assigned prefix is. In the following example the highest assigned prefix is 4, so you need to make sure there are at least 4 videotracks available.
BpmSlicer
  1 source
    1 VideoClip2.mov
    2 LensFlare2.mov
    3 Transition_1.mov
    4 PaperTexture_9.png
    4 PaperTexture_1.mov
As you notice in the example it‘s possible to assign the same prefix to as many footage items as you like. If you assign the same prefix to more then one footage items, this function selects a random footage item each time it finds a midi note for the appropriate videotrack.